How to Add Your WordPress Site to Google Search Console
Do you want to Add Your WordPress Site to Google Search Console?
To optimize your WordPress website for SEO, you must add it to Google Search Console.
It provides specific webmaster tools to help website owners to maintain and monitor their search presence and rankings.
This article will share how you can easily add your WordPress site to Google Search Console.
What is Google Search Console?
Google provides a free tool named Google search console to help website owners to monitor and maintain their website’s presence in Google search results.
You can check your search rankings, indexing issues, security issues, and site errors that may affect your site’s search performance.
If you want to improve your WordPress site SEO, you must add it to the Google search console.
Adding Your Site to Google Search Console
To add your WordPress site to the Google search console, go to the Google Search Console website and click on the ‘start now’ tab.
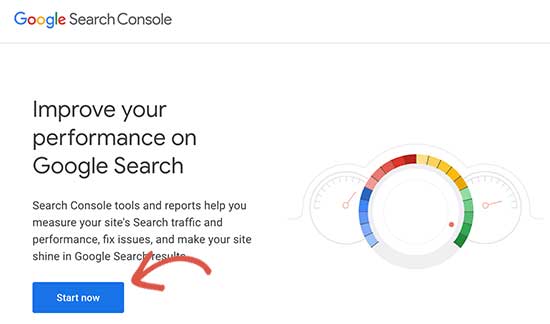
Now, sign up with your Gmail account.
After logging in, you have to select a property type to start with the Google search console.
You will find two options to select, a domain or a URL prefix. We suggest choosing a URL prefix as it is easier to set up.
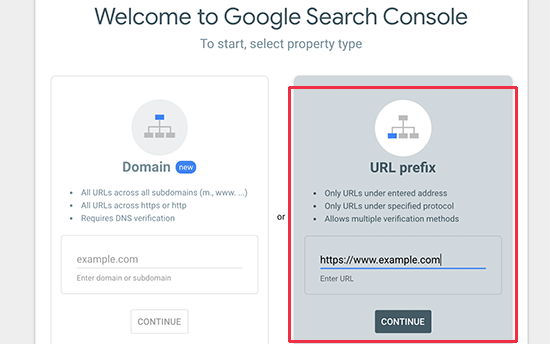
Note:
Remember, Google considers https://www.example.com and https://example.com as two different websites.
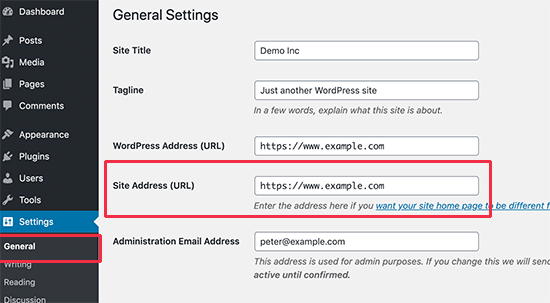
You have to enter your correct website URL used in WordPress. If you are not sure, you can easily find out the exact URL of your site you need to enter.
For this, visit your WordPress admin area and head over to the Settings » General page.
You will notice your website’s URL in the site address section.
Now, copy your site address and add it in the URL prefix area and click the continue option to start.
After that, you have to verify the ownership of your website. You will get multiple methods to do that. We suggest using the HTML tag method.
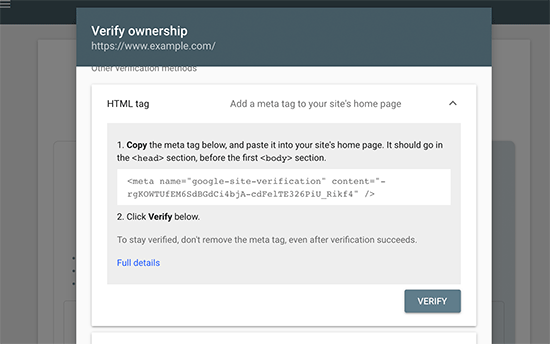
For that, click the HTML tag, copy the code given on the screen and then visit your WordPress website’s admin area.
Now, you have to paste this Google site verification meta tag code in your WordPress so that Google can confirm that you are the website owner.
Note:
Please, don’t edit the header.php file in your WordPress theme and add the code just above the <body> tag because if you update or change your theme, the HTML tag will disappear automatically.
Google regularly checks for the HTML tag and will disable your site in the search console if it does not find the verification tag.
Therefore, make sure that Google can always verify your site ownership.
For this, you can add the code to your WordPress site in two ways.
1. Use the AIOSEO plugin.
You have to install and activate the All in One SEO plugin first. You can see our step-by-step tutorial on how to install a WordPress plugin for more details.
After activation, Visit the All in One SEO » General Settings » Webmaster Tools page and click on “Google Search Console.”
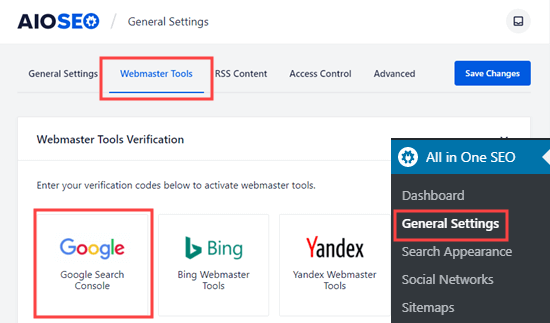
Now, paste the code you copied from Google earlier into the “Google Verification Code” box.
After that, click the ‘Save Changes’ option to save your changes.
2. Use Insert Headers and Footers plugin.
You have to install and activate the Insert Headers and Footers plugin.
You can see our step-by-step tutorial on how to install a WordPress plugin for more details.
After activation, you have to visit the Settings » Insert Headers and Footers page and then paste the code you copied from Google earlier in the ‘Scripts in Header’ box.

Now, click the Save option to store your changes.
From the above two methods, you have to use anyone.
Afterward, go back to the Google Search Console and click on the ‘Verify’ option.
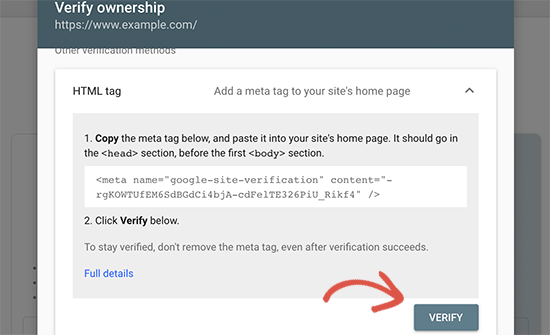
Google will check the verification code on your site and display a success message.
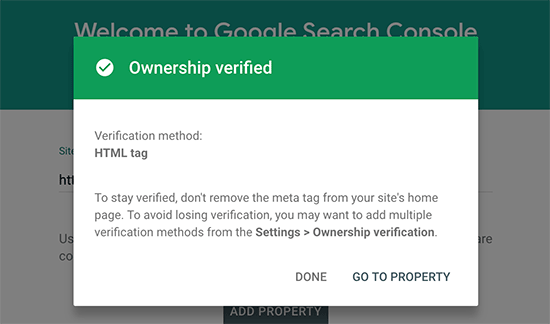
It’s done! Your site is successfully added to Google Search Console.
Note: If the verification fails, you can clear your cache and try again.
Now, You can click the ‘Go to Property’ link to visit your Google Search Console account’s dashboard.
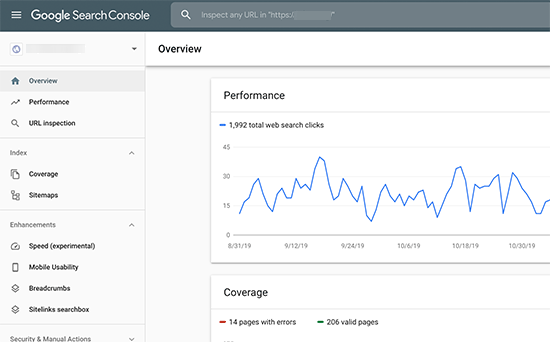
Here, you can see your website’s performance.
You can also tell Google more about your website by adding your XML sitemap. It will help Google crawl your website more Flexibly.
Add XML Sitemap to Google Search Console
An XML sitemap is a kind of file that lists up all your content in XML format.
It is like a roadmap of your site that helps search engines to understand your website structure and leads them to your site’s important pages and index your content.
To know more about how you can create and add an XML sitemap to Google Search Console, you can see our tutorial on How to create and add an XML sitemap in WordPress.
We hope this tutorial helped you add your site to the Google search console.
