How to Set Up an Auto Attendant Phone System for Your Website
Read the tutorial in detail to know how to set up an auto attendant phone system for your Website.
What is an auto attendant phone system?
An auto attendant phone system is automated answering assistance used by businesses and websites to direct the incoming calls to the right person or department. In this, a virtual receptionist automatically receives the call and then leads you to use your keypad to reach the employee.
For example: When you call a company, your call is auto attended, and you are navigated to use your keypad to reach the preferred department.
Benefits of an auto attendant phone system
An auto attendant phone system can help the owners in many ways-
1. It helps to answer calls faster.
2. Improves customer service by offering a consistent experience.
3. It Gives a more professional look.
4. Cut down the costs in a business.
5. Easy to handle calls 24/7.
Why do You Need to Set Up an Auto Attendant Phone System for Your Website?
For small business websites or online stores, you can add a phone number on your site for your visitors to contact you.
However, traditional phone services don’t offer advanced features such as call forwarding, call waiting, auto-attendant, and more.
To increase your site traffic and expand your business, you need to properly set up an auto attendant phone system on your Website.
You can use a virtual business phone service provider that helps you manage your calls, call forwarding, and set up auto attendants at lower prices than a business landline or mobile provider.
Nextiva – A virtual business phone service provider
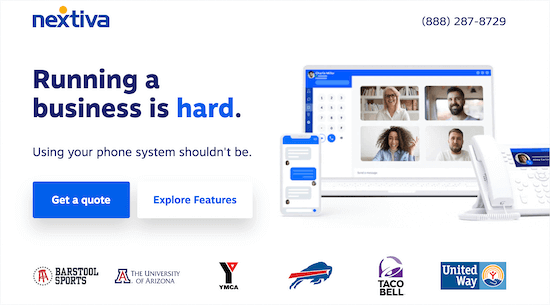
We are using Nextiva to set up an auto attendant phone system. It is considered the best business phone service in the market.
Nextiva is a VoIP ( Voice over internet protocol ) phone technology, which uses the internet to make and receive calls rather than traditional landlines.
It also provides advanced features such as an auto-attendant, voicemail, call forwarding, conference calling, and many more. It helps you save money and lets you manage calls from your mobile phone or your computer. Also, you can get a toll-free number or select a business phone number.
Setting up an auto attendant phone system for your Website.
First of all, sign up for a Nextiva account. You can select a new business phone number during the sign-up process or use an existing one to your account.
Now, you can call up from your business phone number.
After that, you can put up an auto attendant phone system for your site.
Visit your account page, click the ‘communication’ menu option, and click on the ‘Phone System.’
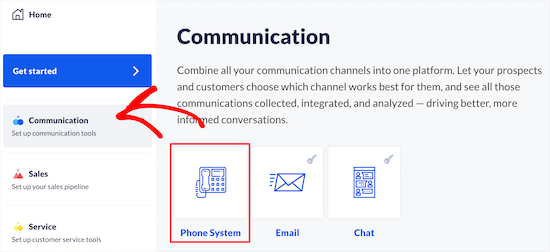
With this, you will reach a page where you will get different options to set up features for business phones.
Here, click on the ‘Call flows.’
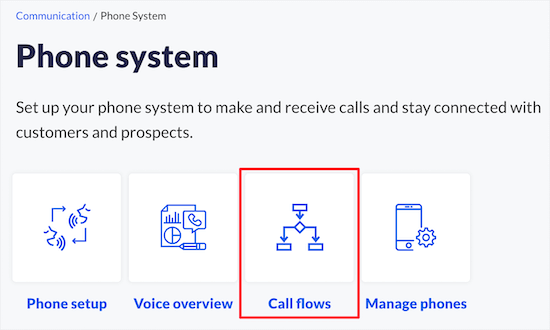
You have to create a new call flow on the next page.
For this, select the ‘create New Flow’ button.
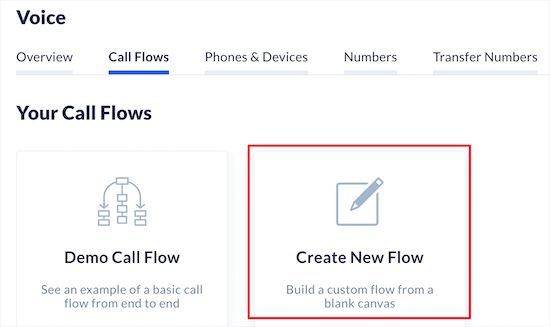
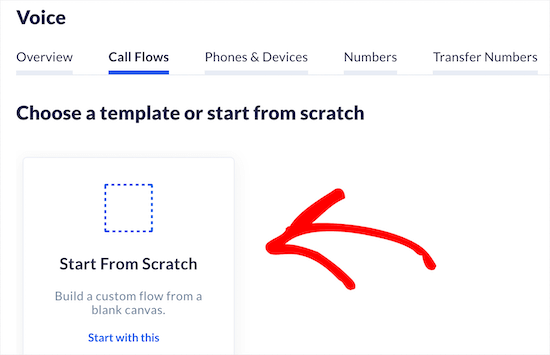
On your next screen, you will get an option to ‘choose a template or start from scratch.’
If you have call templates for other features, they will be visible here.
We are select the ‘Start and scratch’ option.
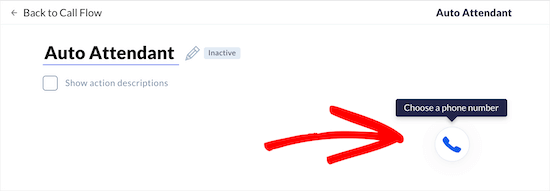
Here, you will get the option to give a name to your call flow.
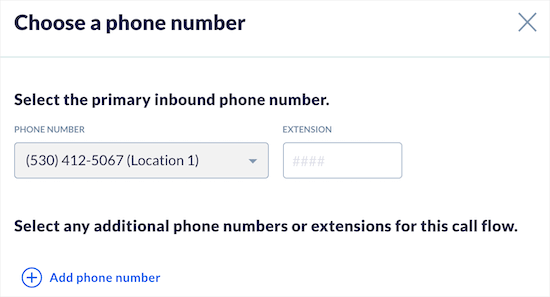
Next, click on the ‘Phone’ button and enter your business phone number.
You can add an additional phone number and extension as well.
Now, tick the ‘Save & Continue’ button.
For the next step, click the ‘Add Action’ button.
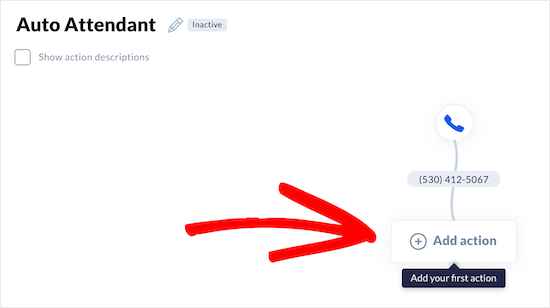
You will get a menu where you can select the following action.
To create an auto-attendant, Select the ‘Phone menu’ option.
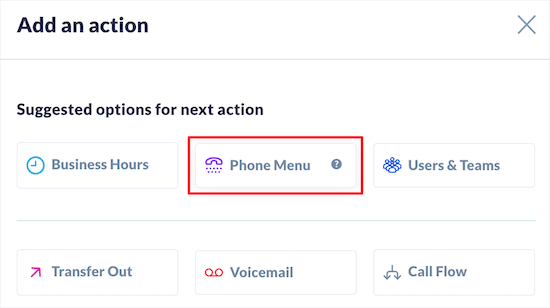
The ‘Phone menu’ option lets you record a greeting and then offer callers options to reach specific team members or departments.
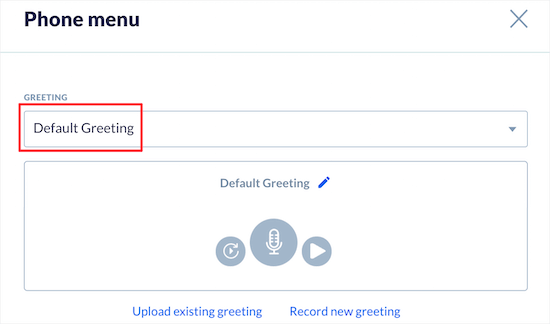
Now, you can select the ‘Default Greeting’ from the ‘Greeting’ drop-down option.
You can also record or upload your greeting.
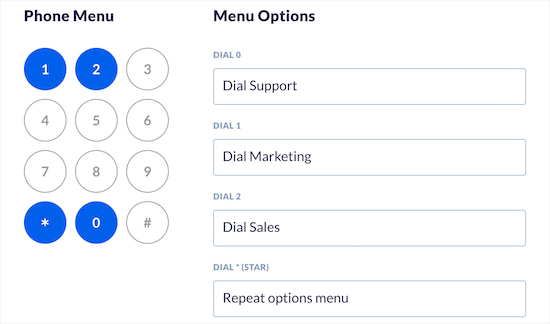
Then, you can modify the phone menu options that will play after your greeting.
You can place the keypad under the ‘Phone Menu.’ and specify the numbers to the particular person or department. The users can dial the number and reach the specified person or department.
Such as, For multiple options, select the number, and add the particular department in the ‘Menu Options.’
Now, you can change the ‘Advanced Options’ settings.
In advanced options, You can set up the timeout length, choose an option for dialing the operator, and tick the checkbox to allow callers to dial their extension.

Now, click the ‘Save & Continue’ option.
After this, you will return to your main call flow screen. Now, you have to assign phone numbers and team members to the call options you just made.
For this, click the first ‘Add action’ buttons.
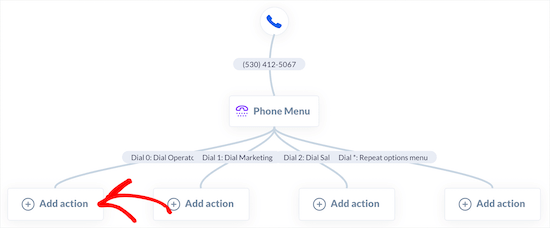
Then, select the ‘Users and Teams’ option.
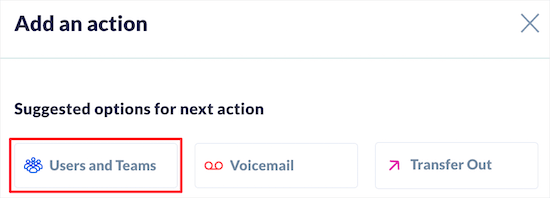
Now you can assign the action to the specific team member or department.
Then, you can select how it will ring, to whom the call will ring, caller ID settings, and others.
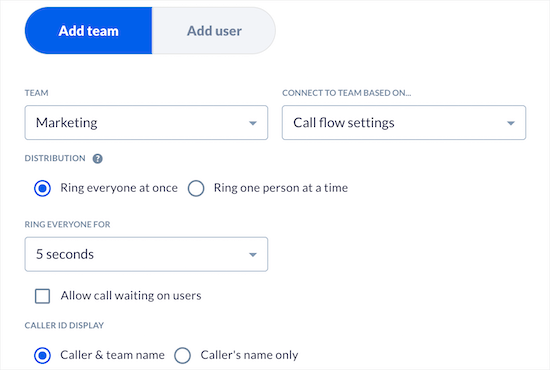
You can set the best options for your business or site and then tick the ‘Save & Continue’ button.
Now, you have to follow the same steps for all the call menu options you made earlier.
After that, you will return to your main call flow screen.
You have to click the ‘Add action’ button again to complete your call flow.
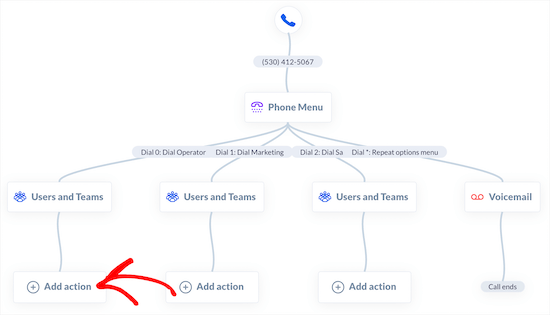
You will get different options to select the next step if no one answers the call.
We are using the ‘Voicemail’ option so that callers can leave a message if nobody answers the call.
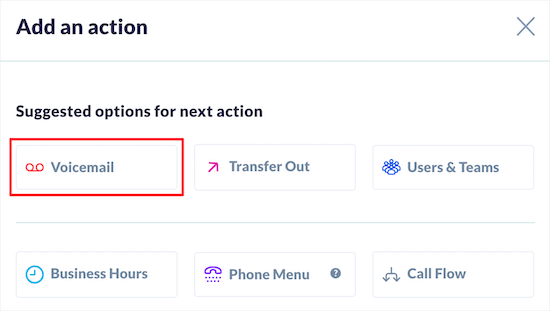
Next, you can select your voicemail mailbox and message.
You can select the team or person from the ‘Voicemail Destination’ menu and the department from the ‘Team’ menu.
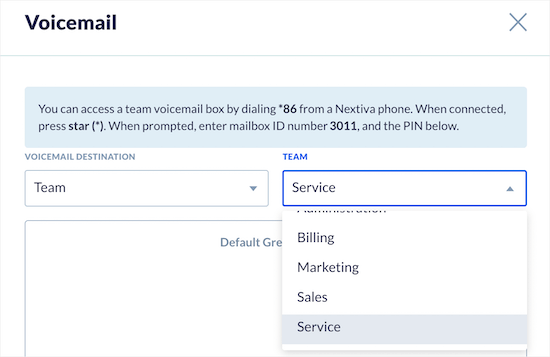
Now, tick the ‘Save & Continue.’
After that, you have to follow the same steps for each extension.
When you’re done, you will see ‘Call ends’ at the end of your call flows.
Then, don’t forget to click the ‘Go Live’ option at the bottom of your screen to activate the call flow.
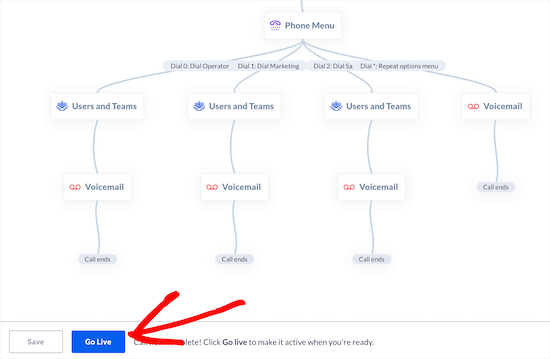
You must check out the auto attendant feature on your Website to ensure the greeting and call forwarding works properly.
How to add a call now / click to call button in WordPress
After setting up an auto attendant phone system to your site, you would like to add a click-to-call button to your Website.
Adding a click-to-call button makes calling effortless.
WP Call Button plugin
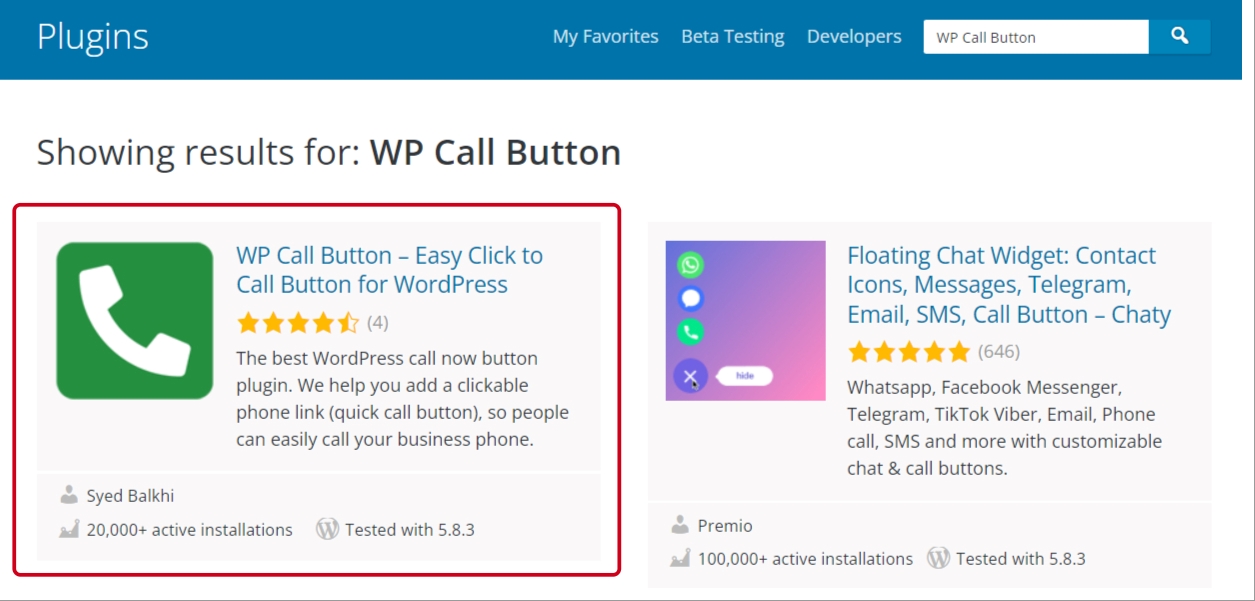
The WP Call Button plugin allows you to add a call now or click-to-call button on your Website with just a few steps.
Now, You can check our guide on Install and Activate the plugin or follow the below steps.
On you dashboard, go to plugins >> add new >> search WP Call Button plugin >> click Install and Activate.
After activation, Go to the Settings » WP Call Button for setting up the plugin.
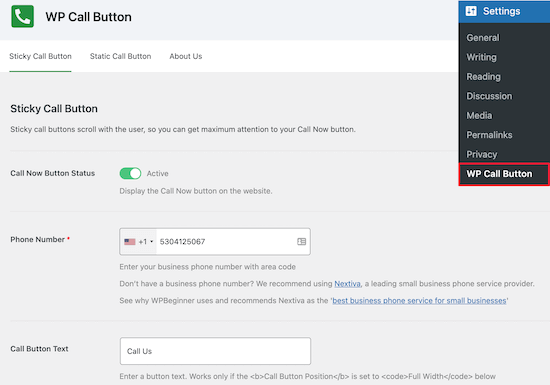
Now, turn on the ‘call now button status’ and add your number.
Then, you can adjust the appearance of your button on your Website.
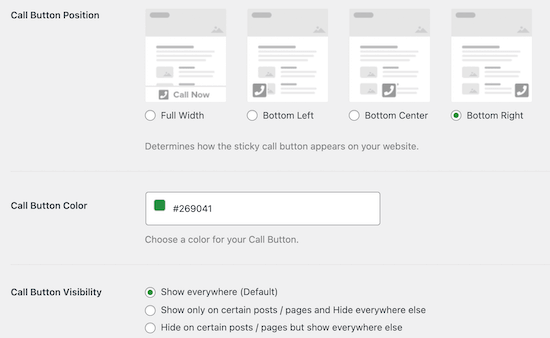
You can control the button visibility by selecting show or hide the button on the pages.
Click the ‘ Static Call Button ‘ menu if you want more control over the button appearance.
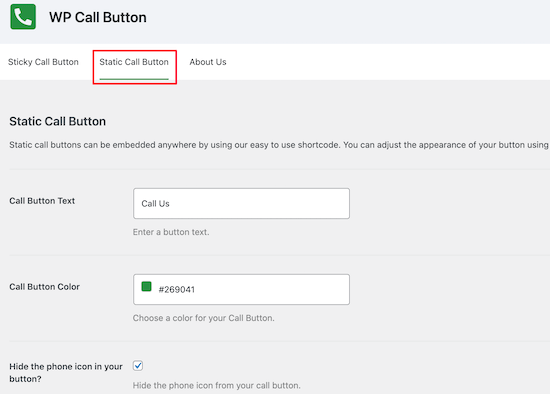
Then, change the button settings accordingly.
When you’re done customizing the settings, click on the ‘Save Changes.’
Also, You can directly add a sticky button to your posts, pages, and widget areas by using the included block.
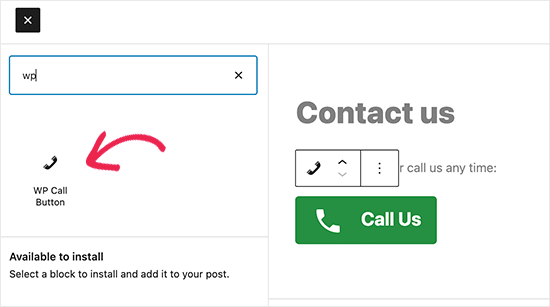
In the block settings, you can show or hide the phone icon and change the colors, size of the text, and alignment.
After that, click ‘Update’ or ‘Publish’ to save the changes.
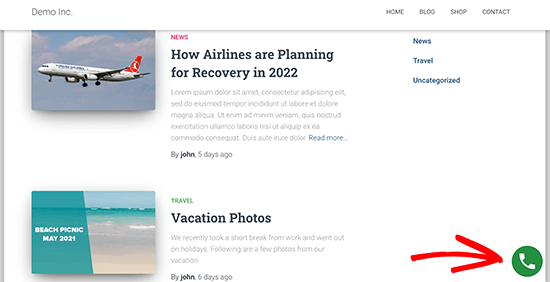
Now, your visitors can see the click to call button live on your Website. They will be directed to your auto attendant phone system when they click the button.
To conclude-
Today, we have explained how you can set up an Auto Attendant Phone System for your Website. You will also learn about an auto attendant phone system, its benefits, and A virtual business phone service provider- Nextiva and the WP Call Button plugin to add a click-to-call button on your Website.
If you have liked this, you can also check our guide on how to add Facebook like button in WordPress.
