How To Customize WordPress Reset Password Page
This WP tutorial will show you how to customize the WordPress reset password page. The default reset password form displays the WordPress branding, and it does not match your site’s theme as well.
Therefore, You can customize your Reset password page so that your users can keep the look and feel of your theme when they forget ana reset password.
Need of Customizing the Reset Password Page?
The WordPress website allows users to register for a user account, log in to their account and forget and reset passwords.
These pages display the WordPress logo and branding by default.
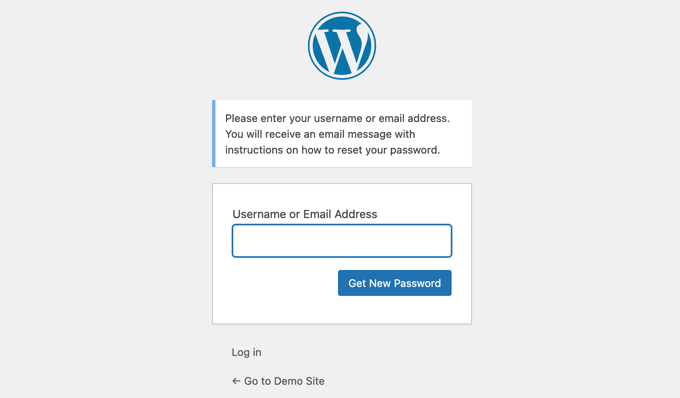
It’s okay if you and your team members only log in to the admin area. But if you have a membership or multiuser website or e-commerce store, your users will also log in to your site.
Therefore, to provide a better user experience, you should customize your user pages to match your website theme with your logo and site’s details.
In this lesson, we will use different plugins and codes to customize the reset password page in WordPress.
Customizing Reset Password Page Using Plugins.
1. Formidable Forms plugin
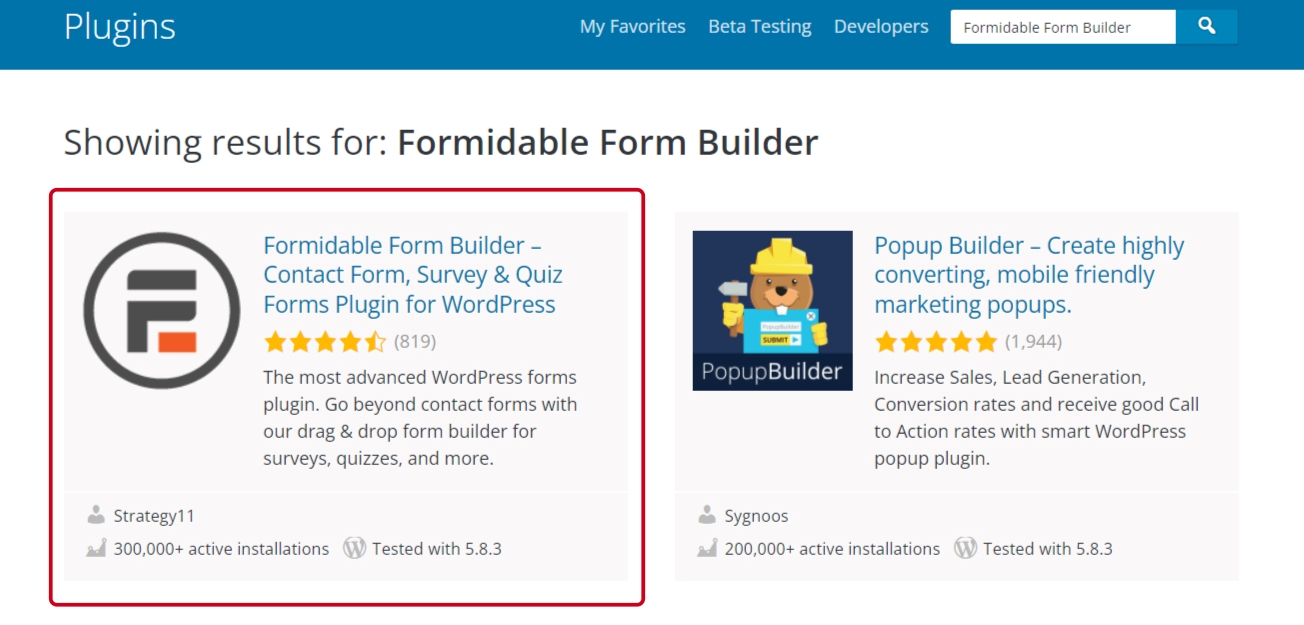
To customize the reset password page, Install and Activate the Formidable Forms plugin.
Go to plugins >> add new >> search Formidable Forms >> Install >> Activate.
It is the most powerful and advanced WordPress form builder plugin. As there is a free version, you will need a Pro account to create a reset password page.
After activation, go to the Formidable » Add-Ons page.
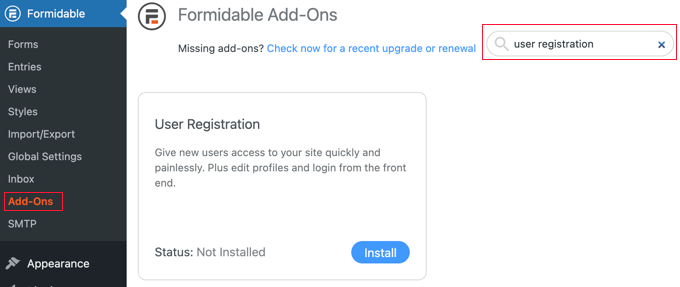
Then, search the User Registration add-on, which is needed to add a login screen, and reset the password page to the front end of your website.
When you find it, click on the Activate option to enable the add-on.
Then, you are ready to create a customized reset password page.
To create a new page, go to Page » Add New.
After that, give a title to your page and paste the given shortcode [frm-reset-password] into the WordPress content editor.
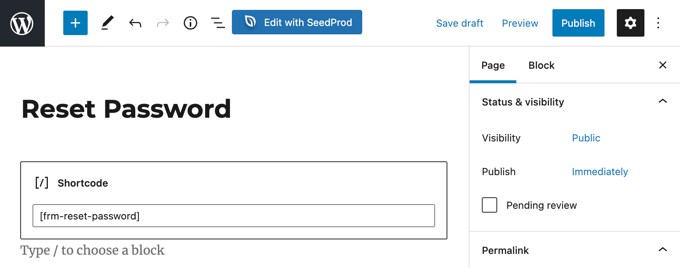
You can also display additional content on your page from here.
Then, click the publish button from the top right of the screen.
Lastly, make sure that WordPress uses this page when someone resets a password.
For this, go to the Formidable » Global Settings and then select the ‘Registration’ tab from the menu.
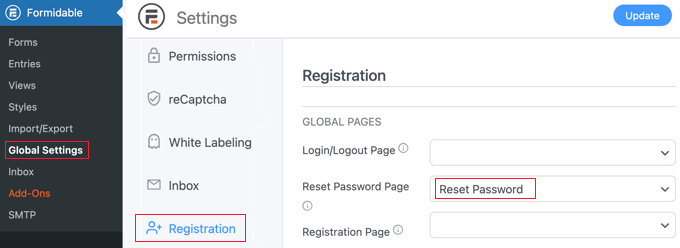
Here, you have to look for the ‘Reset Password Page’ option and select the page you have just created from the menu.
Now, make sure to click the ‘Update’ button to save your settings.
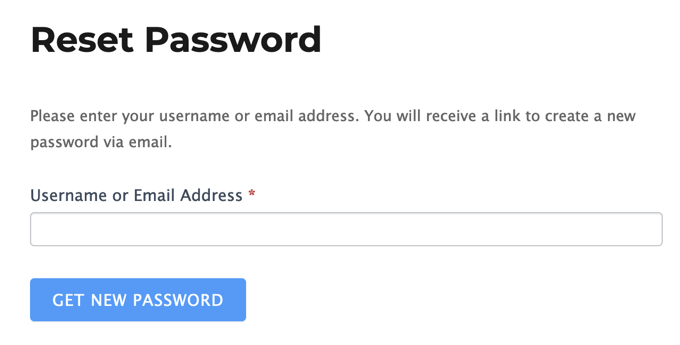
You can test your website to see the custom reset password page in action.
2. Theme My Login Plugin
The Theme My Login plugin in WordPress is not much customizable, but it is a simple and free method to modify the login and reset password pages to match your WordPress theme.
Firstly, Install and activate the Theme My Login plugin.
Go to plugins >> add new >> search Theme My Login >> Install >> Activate.
After activation, the Theme My Login plugin automatically creates URLs for your custom login, logout, registration, and forgot and reset password actions.
You can customize these URLs by navigating to the Theme My Login » General page.
Now, Scroll down to the ‘Slugs’ option to customize these URLs used by the plugin for login actions.
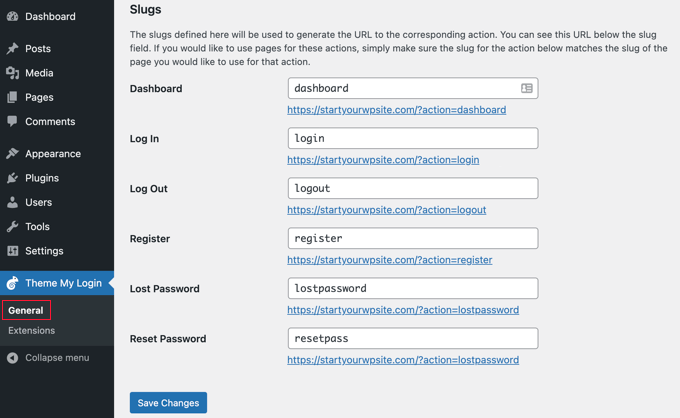
You will notice that the slugs for ‘Lost Password’ and ‘Reset Password’ are the same. Leave the default settings as it is.
Now, create a new lost password page.
To create a new page, go to Page » Add New. Then, give a title to your page and then paste the given shortcode [theme-my-login action=” lostpassword”] into the content area.
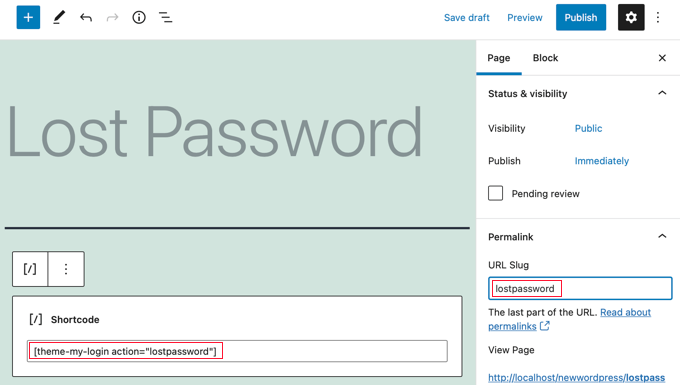
Now You have to change the page’s URL slug to lostpassword so that Theme My Login redirects the standard lost password URL to this page.
You can add additional content to the page and click on the ‘Publish’ option to save it. You can also select preview to see it in action.
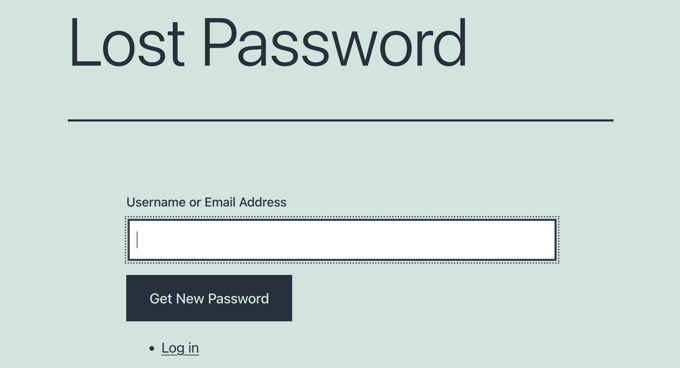
After that, you have to repeat the above process to create a customized reset password page.
You have to place the shortcode [theme-my-login action= “resetpass”] to the page’s content. Also, you need to change the URL slug to lostpassword.
Change the WordPress reset password page Logo and URL
To create a completely customized WordPress reset password page for your website, use the following plugin and coding method. These two methods will replace the default logo with your logo on the reset password page, and it will also replace the login screen logo.
1. By using the plugin – Colorlib Login Customizer
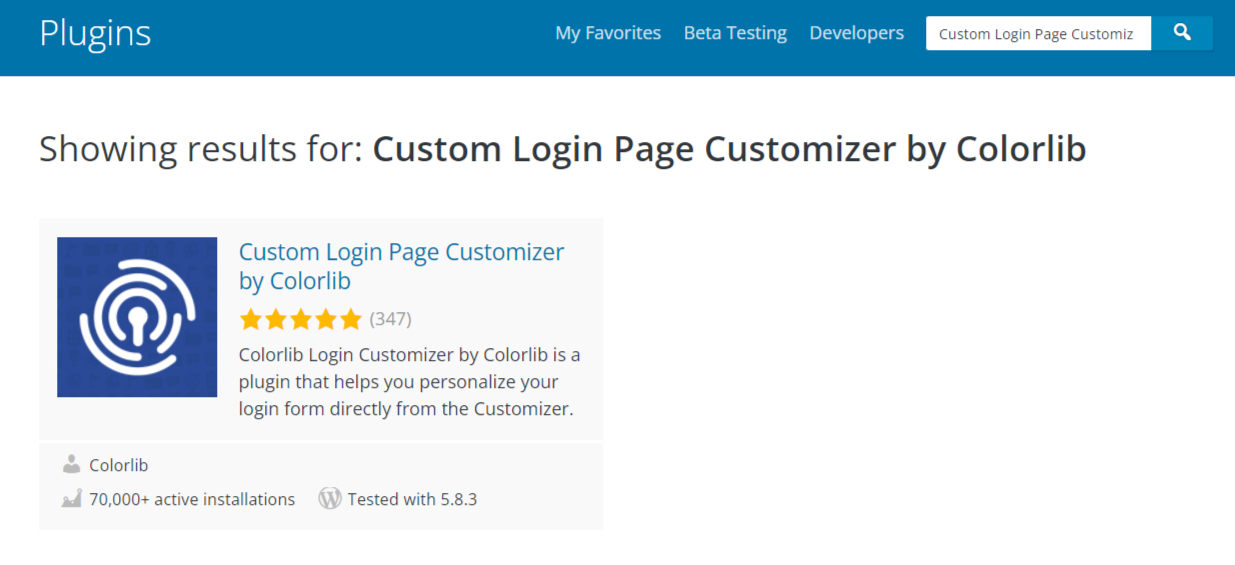
Firstly, Install and Activate the Colorlib Login Customizer plugin.
check our stepwise guide to install plugin or follow the below steps.
Go to plugins >> add new >> search Colorlib Login Customizer >> Install >> Activate.
After activation, It will add up a new menu named ‘Colorlib Login Customizer’ to the WordPress admin sidebar.
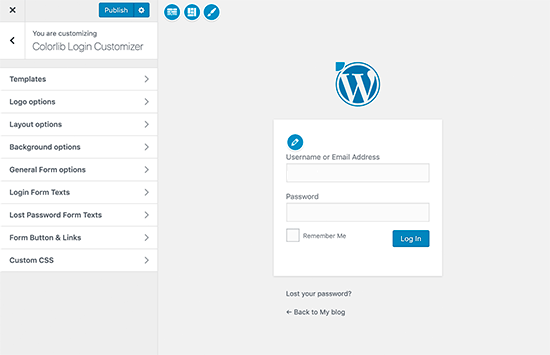
When you click the login customizer, it will open your default WordPress login screen with many customization options on the left and a live preview on the right of the screen.
Now, to replace the default WordPress logo with your own, select the ‘Logo options’ tab.
Here, you will get different options for customizing the logo. You can upload your own custom logo, hide the WordPress logo, change the logo URL and text.
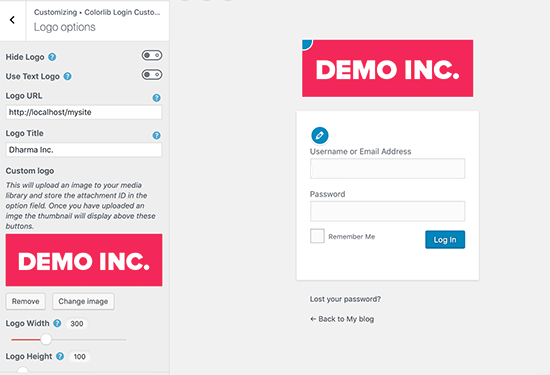
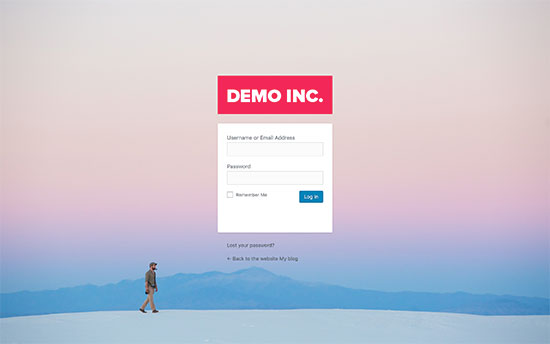
The plugin will also let you change the default WordPress login page settings completely. You can change login form colors, add columns, background images, and more.
This means you can create a custom WordPress login page without changing the default WordPress login URL.
When you are done, click the publish tab to save the changes. Now you can see the customized WordPress login page.
2. By using the code
The coding method allows you to replace the WordPress logo with your custom logo on the login screen manually.
First, you have to upload your custom logo to the media library.
For this, go to Media » Add New and then upload your custom logo.
After uploading the image, select the ‘Edit’ link next to it. Now, the edit media page will open. You have to copy the file URL and paste it into a blank text file on your computer.
After this, add the following code to your theme’s functions.php file or a site-specific plugin.
 function wpb_login_logo() { ?>

    <style type="text/css">

        #login h1 a, .login h1 a {

            background-image: url(http://path/to/your/custom-logo.png);

        height:100px;

        width:300px;

        background-size: 300px 100px;

        background-repeat: no-repeat;

        padding-bottom: 10px;

        }

    </style>

<?php }

add_action( 'login_enqueue_scripts', 'wpb_login_logo' );
You must replace the background-image URL with the file URL you copied earlier.
Now you have changed the default WordPress logo with your logo.
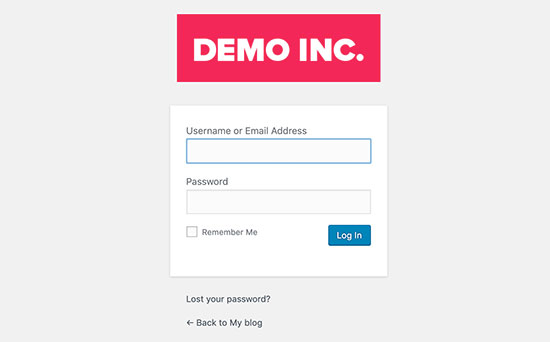
However, the code only replaces the WordPress logo but does not change the logo URL, which indicates the WordPress.org website.
To change the URL of the logo, add the below code in your theme’s functions.php file or to a site-specific plugin.
You can place this code just below the code you added earlier.
 function wpb_login_logo_url() {

    return home_url();

}

add_filter( 'login_headerurl', 'wpb_login_logo_url' );


function wpb_login_logo_url_title() {

    return 'Your Site Name and Info';

}

add_filter( 'login_headertitle', 'wpb_login_logo_url_title' );
Note- Do not forget to replace ‘Your Site Name and Info’ with your site’s actual name.
Now, the custom logo of your login screen will now point to your site’s home page.
To conclude-
We hope you have understood how to customize the WordPress reset password page. Customizing the reset password page provides a better user experience and helps you to match your website theme with your logo and site’s details. We have explained different plugins and codes to customize the password page.
If you have liked this, you can also check our another post on how to recover a lost password in WordPress.
