How to Fix ‘Comments Are Closed’ in WordPress
Is your WordPress post showing the ‘Comments are closed’ message?
The message appears when comments are disabled on a post. But, some users complain about seeing the message unexpectedly.
In this tutorial, we’ll share how to fix ‘Comments are closed’ in WordPress.
What do the ‘Comments Are Closed’ in WordPress mean?
The comment section of your WordPress blog lets your website users ask questions, give feedback, show their opinion on the topic, and reply to other comments.
By default, comments are disabled on all WordPress pages, and you will not see the ‘Comments are Closed’ notification on pages. But, you can follow the guided steps below to turn on comments on your posts as well as pages.
For blog posts, you can deactivate comments on particular posts or on your whole WordPress website. For instance, you may want to deactivate comments on an announcement post.
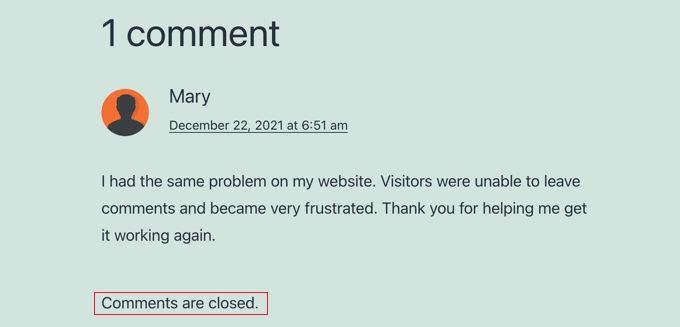
When you deactivate comments on a post with at least one comment, you will notice the message ‘Comments are closed.’ This tells your readers that the comments are full for this post, and they can’t add further comments.
If you deactivate comments on a post with no comments, you will not see the message ‘Comments are closed. Simply WordPress will not display the comment form.
If you are seeing the ‘Comments are closed’ message on your website unexpectedly, we will explain what settings you should check to activate the comments on your blog posts.
Now, let’s move to the methods directly to fix ‘Comments are closed’ in WordPress.
Activate Comments on Future Posts
Comments are often disabled on a WordPress site by default.
To check this setting, go to Settings » Discussion.
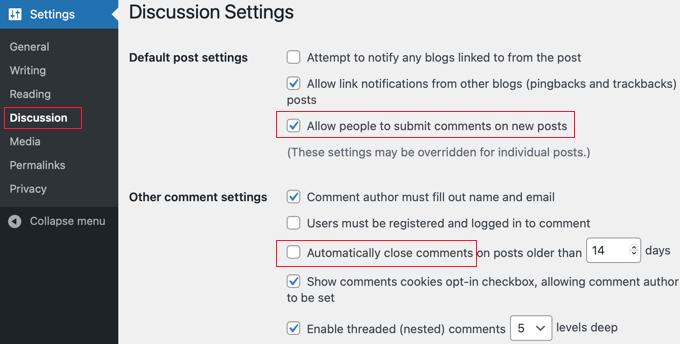
In this section, you will see a set of checkboxes that control comments on new posts.
The first setting to find is ‘Allow people to post comments on new articles. Check this box so that the comments on future posts are enabled.
Next, find the ‘Automatically close comments on articles older than XX days. This setting is helpful if you do not want users to comment on older posts. But, if you want to allow comments on all posts, then make sure to uncheck the box.
Once you have configured the settings, click on the ‘Save Changes’ tab at the bottom of the screen.
This will make sure comments are activated on all new posts you create. However, it will not enable them on posts already created.
Activate Comments on a Specific Post
This method will explain how to activate comments on existing posts one at a time. But, if you want to activate comments on many posts, you should follow the ‘Activate Comments in Bulk’ method below.
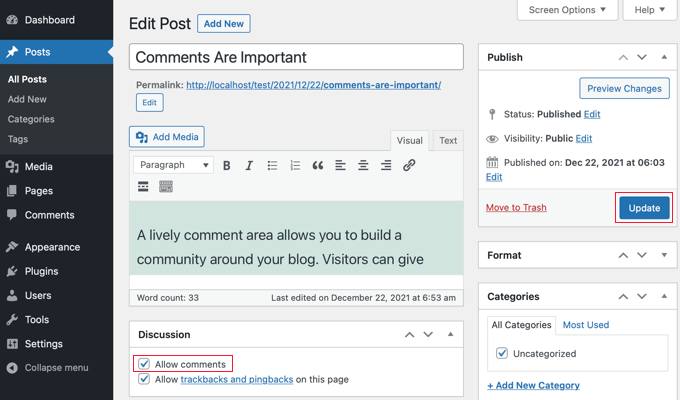
If you prefer to use the block editor on your WordPress site, scroll down the settings on the right to reach the Discussion panel.
Now, click on the ‘Discussion’ options, and check the ‘Allow comments’ box.
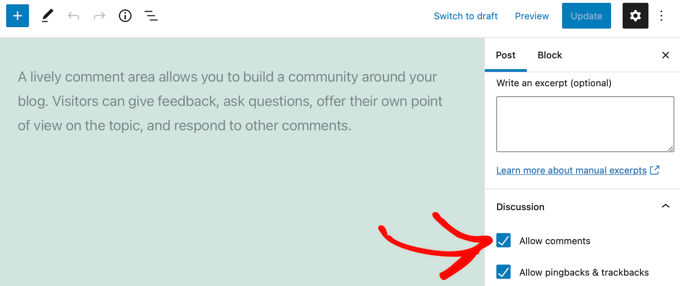
After that, click the Update tab at the top of the screen to save the setting.
Now, it will activate the comments for this post. You can repeat these steps to activate comments on other blog posts.
Also, You can follow the same process to fix the ‘Comments are closed’ issue and activate comments on WordPress pages.
-
How to show the Discussions Panel if It Is Hidden
By default, the Discussions panel is displayed on WordPress. However, it may be hidden on your website.
To find it, click the Options icon ( the three vertical dots ) at the top right of the screen.
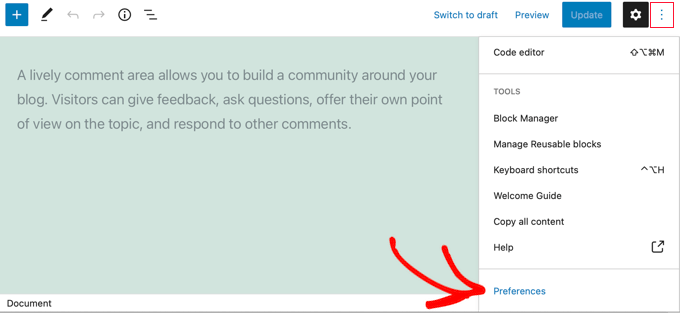
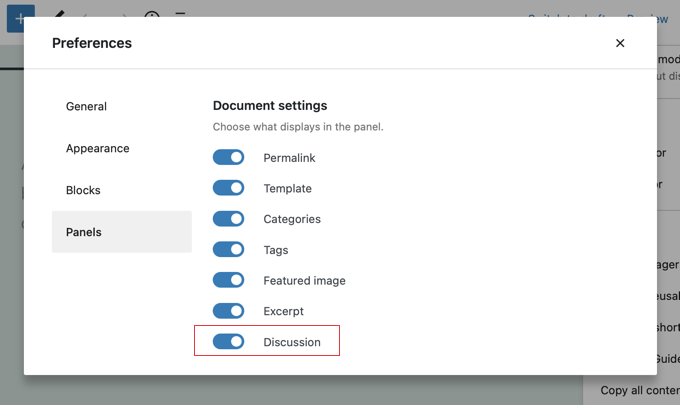
Then, You have to click on ‘Preferences’ and visit the ‘Panels’ tab.
After that, switch on the toggle next to the ‘Discussion’ to display the panel.
Activate Comments on a Specific Post (Classic Editor)
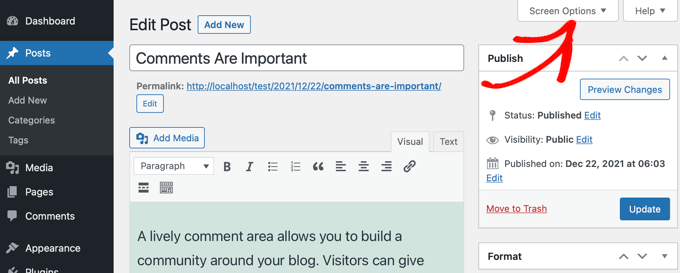
If you use the classic editor on your WordPress site, then the steps for activating comments on a post are slightly different.
The Discussion meta box is not visible by default in the classical editor. To display it, click on ‘Screen Options’ at the top right of the screen.
Then, you have to check the Discussion box under the ‘Screen elements.’ After that, click on the ‘Screen Options’ again to go back to your post.
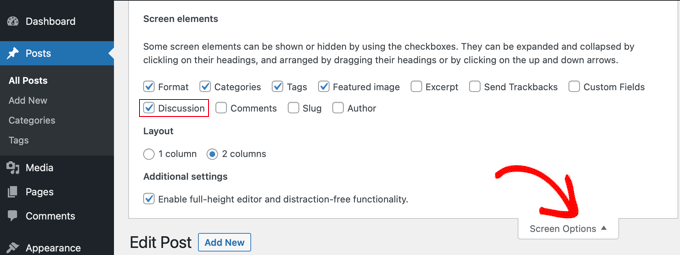
Now, visit the bottom of your post to see the Discussion meta box.
Then, make sure to check the ‘Allow comments’ box.
Click the Update tab to save the setting, and the comments will be activated for this post.
Activate Comments on Posts in Bulk
If you want to activate comments on multiple posts, then you can update them in bulk.
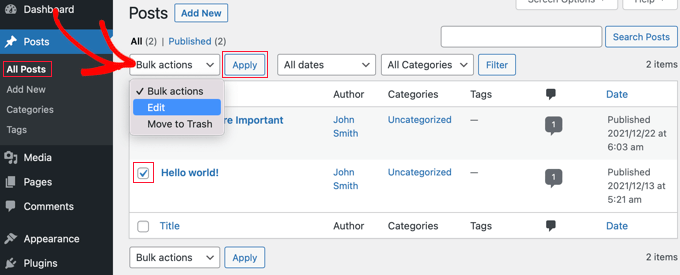
For that, go to the Posts » All Posts page, where you will find a list of your all posts.
Now, You have to select the posts that have disabled comments by clicking the checkbox next to each post.
Then, you have to select ‘Edit’ from the Bulk Actions drop-down box and then click the ‘Apply’ tab. This will bring the bulk edit screen.
Here, click the ‘Comments’ drop-down menu and then click the ‘Allow’ option.
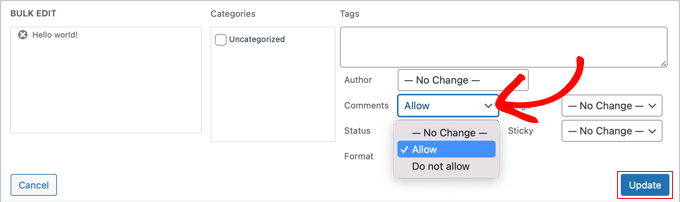
After that, click the ‘Update’ tab to save the setting and activate the comments for all selected posts.
-
How to Select All Posts At Once
If you want to activate comments for every post on your website at once, then the above steps will take a lot of time if you have many blog posts on your website.
For doing it quickly, there are a few more steps you have to take.
First, make sure that all posts are displayed on a single page.
You can see the Number of all the posts on your website under the ‘Posts’ option at the top of the screen.
If you have 20 posts or fewer posts on your site, they are already present on one page. But if you have more than 20 posts, you will have to change the number of items per page.
For that, click on the ‘Screen Options’ at the top of the page. Then, change the ‘Number of items per page’ setting under Pagination. Here, type the number larger than the total posts on your website.
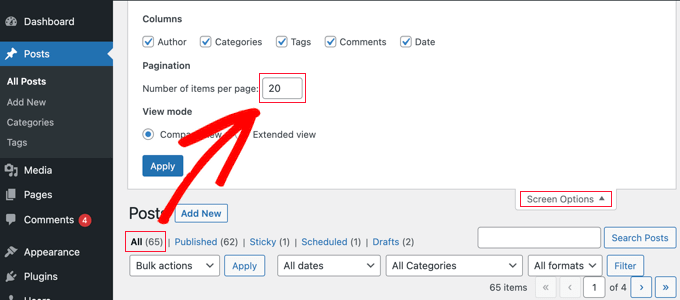
For instance, if you have 65 posts on your site, you can change the number to 70.
Then, click the ‘Apply’ tab, and then it will display all of your posts on a single page. Now, click on the ‘Screen Options again to hide the settings.
Now, click the check box next to ‘Title’ to select every post on your site.
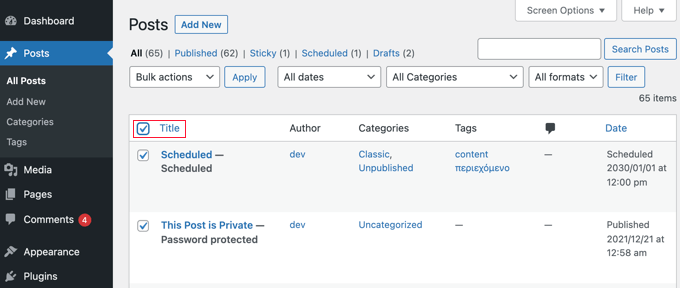
Then to activate the comments on all of these posts, you have to click ‘Bulk Actions’ then ‘Edit.’
After that, follow the steps we covered earlier in this section to change the Comments setting to ‘Allow.’
Note: We do not suggest updating hundreds of blog posts at once if you have slow web hosting, as your site may time out or freeze up before finishing all the updates.
Check for Incompatible Plugins or Themes
If you have attempted all of the above-stated steps and comments are still deactivated on your site, then it might be because of an incompatibility with one of your plugins or your theme.
Sometimes wrongly coded WordPress themes may by mistake display the ‘Comments are closed’ message even when comments are activated.
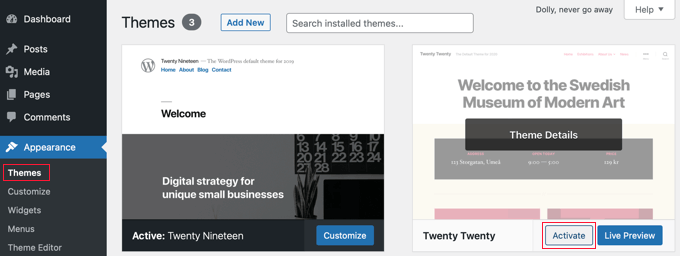
To check if your theme is creating the issue, go to Appearance » Themes and temporarily activate any other theme.
If the issue ‘Comments are closed’ message is now fixed, then your theme was the problem. You should fix the issue related to it by yourself or take help from the theme developer.
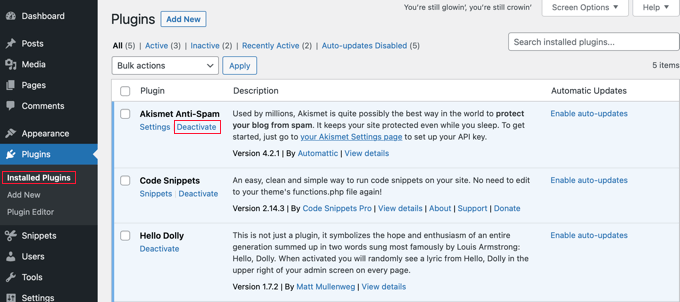
If the issue persists and the plugin may be causing the issue, go to Plugins » Installed Plugins and check that you haven’t installed a plugin designed to disable comments, like Disable Comments.
If you have installed it, then disable that plugin and check the comments are working now.
But if comments are still closed and not working, you have to look for incompatible plugins.
For that, You will have to temporarily deactivate the plugin one at a time by clicking its ‘Deactivate’ link and checking if comments are activated on your site or not.
If comments are still not working, this plugin is not creating the issue. Click the ‘Enable’ link of the plugin and move on to the next plugin.
We hope this write-up helped you fix the ‘Comments are closed’ issue in WordPress.
If you are experiencing any other error on your site, you can fix it by following the steps told in our other article on what to do when you are logged out of the WordPress admin area.