How to Create Additional Image Sizes in WordPress
WordPress creates several copies of image uploads in different sizes automatically and, most WordPress plugins and themes also create their image sizes.
But, if you want to upload an image with the dimensions you need, you must create additional image sizes.
Today, we will explain how you can create additional image sizes in WordPress.
WordPress Default Images Sizes
By default, WordPress comes with three standard image sizes.
Thumbnail (150*150), Medium ( 300*300), and Large (1024*1024)
When you upload a picture to your website, it automatically creates copies in those above sizes.
Why Create Additional Image Sizes in WordPress?
WordPress’s default image dimensions are standard, and most WordPress plugins and themes manage image sizes nicely.
However, you may need different image sizes as the standard does not fits your requirement.
In that case, you will need to create additional ones. So that when you upload an image to your site, WordPress automatically converts it to all the different sizes you need.
Adding Additional Image Sizes for your Theme
Most WordPress themes support post thumbnails feature by default.
But, if you are making a custom WordPress theme, then you must add support for post thumbnails.
To add the code, go to Appearance » Editor and edit the functions.php file of your theme. Copy and paste the following code there:
add_theme_support( 'post-thumbnails' );
Then, click the Save button to enable the add_image_size() function so that you can add new WordPress image sizes.
The add_image_size function format is below:
add_image_size( 'name-of-size', width, height, crop mode );
Below are some example codes that can help you add additional image sizes to your site:
 add_image_size( 'sidebar-thumb', 120, 120, true ); // Hard Crop Mode

 add_image_size( 'homepage-thumb', 220, 180 ); // Soft Crop Mode

 add_image_size( 'singlepost-thumb', 590, 9999 ); // Unlimited Height Mode
Here, we have defined three different types of image sizes. Each has various modes, like hard crop, soft crop, and unlimited height.
Let us move to each one and know how you can use them in your posts.
1. Hard Crop Mode
The Hard Crop method ensures that everything is proportional. This function automatically crops the image from the sides or top and bottom, depending on the size. There is a “true” value-added in the code after the height, Directing WordPress to crop the image to the defined size (in this case, 120 x 120px).

2. Soft Crop Mode
In WordPress, soft cropping mode is turned on by default. That’s why you do not see any additional value-added to the code after the height. It resizes the image proportionally without distorting it. This means it keeps its original aspect ratio and, therefore, shape. So you may not get the measurements that you wanted. Look at the example below.

3. The Unlimited Height Mode
If you want to add super long images in your WordPress post but limit the width, you can use the unlimited height mode.
This mode lets you set a width that will not break your design while leaving the height to be unlimited.
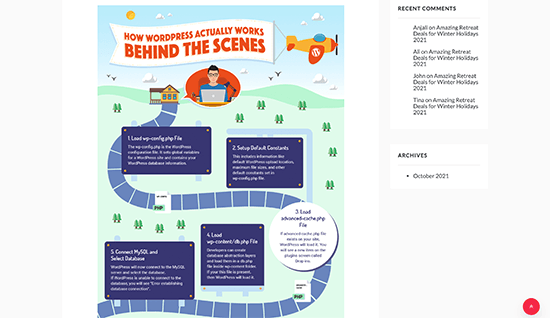
For example, infographic images tend to be very long.
Displaying additional image sizes in your WordPress theme
After adding the functionality for the desired image sizes, you have to display additional images in the WordPress theme.
Open the theme file and add the following code in the theme file inside the post loop where you want to display your thumbnail:
<?php the_post_thumbnail( 'your-specified-image-size' ); ?>
This code will display additional image sizes in your WordPress theme.
Note– Change ‘your-specified-image-size’ with the image name you set in the earlier step (such as ‘post-thumbnail size’) in this code.
Regenerate Thumbnails For Previously Uploaded Images
The above ‘add_image_size()’ function only develops the sizes after placing the code into the theme.
Therefore, you must regenerate thumbnails in WordPress to update all your previously uploaded images to the new thumbnail sizes.
You can fix this using the Regenerate Thumbnails plugin. This will update your WordPress images to the additional sizes you added in the previous steps.

First, install and activate the plugin by following the given steps or you can check the complete installation process here.
Go to plugins >> Add new >> Search Regenerate Thumbnails>> Install >> Activate.
After activation, go to Tools » Regenerate Thumbnails.
Here, you will get two options to regenerate thumbnail for all images or just the featured images. Select the all image option.

This will regenerate thumbnails for all your images in WordPress.
Enabling Additional Image Sizes for your Post Content
In the previous methods, you have enabled image sizes in your theme; therefore, it is only limited to your theme.
All image sizes are being generated regardless, so to control the image size, add the given code to your theme’s functions file to enable additional image size for your post content.
 function wpb_custom_image_sizes( $size_names ) {

    $new_sizes = array(

        'homepage-thumb' => 'Homepage Thumbmail',

        'singlepost-thumb' => 'Infographic Single Post'

    );

    return array_merge( $size_names, $new_sizes );

}

add_filter( 'image_size_names_choose', 'wpb_custom_image_sizes' );

After placing the code, make sure to save the changes.
Witness the code in action by uploading an image to a WordPress post or page. You’ll see your custom image sizes under the ‘Image size’ option in the image block settings.
Now you can select the image size options while adding images to posts and pages.
To conclude, WordPress comes with three default sizes: Thumbnail, Medium, and Large. It creates several copies of image uploads in different sizes automatically.
If these standards do not fit your requirement, you can create additional image sizes in WordPress so that you can upload an image with the dimensions you need.
If you have like this, you can also check our another post on how to add captions to featured image in WordPress.
We hope this tutorial helped you.