
How to Install a WordPress Plugin
After installing WordPress, the very first thing every beginner thinks about is how to install a WordPress plugin.
In WordPress, there are plugins for everything. Read further to know What plugin is and how to install it in WordPress.
What is a WordPress Plugin?
The plugin is a piece of software that can add additional functions to your website or enhance the existing functionality of your site.
This means they are like apps for your WordPress site that help you create and manage a fully customized website.
They help you optimize your site for search engines, improve user experience, and protect your site against spammers.
In WordPress, there are hundreds and thousands of free and paid plugins available. You can choose and install according to your need.
Note: You cannot install plugins on the WordPress.com website because it has limitations. To use plugins in WordPress.com, you have to upgrade to their business plan.
On the contrary, you can install any plugin on your self-hosted WordPress.org website.
How to Install a WordPress Plugin
You can install WordPress plugins in three ways.
1. Install using Plugin search
2. Install using the plugin upload option
3. Install using FTP
Ready? Let’s start one by one.
1. Using WordPress Plugin Search
Plugin search is the easiest way to install a WordPress plugin. The only limitation is that the plugin must be Present in the WordPress plugin directory. In the plugin directory, only free plugins are included.
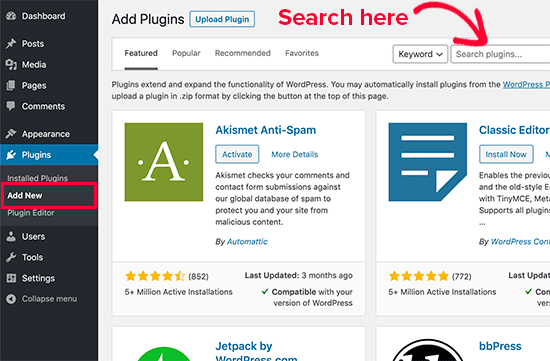
Moving to the method, First, you have to visit the WordPress admin dashboard.
Then, go to the Plugins » Add New option.
On the Add Plugin page, search the plugin by typing the plugin name or the functionality you want.
After that, you will get the list of plugins like the below example.
Pick the plugin you want. Let us show you an example. We want a WPForms plugin.
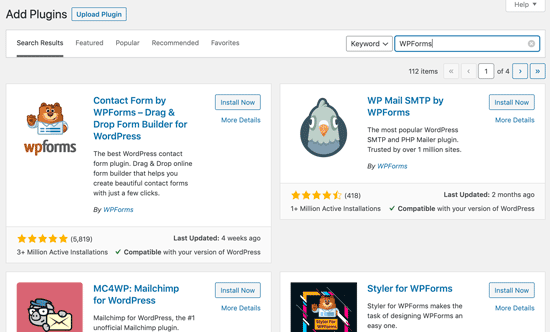
Now, click the ‘Install Now’ option next to it.
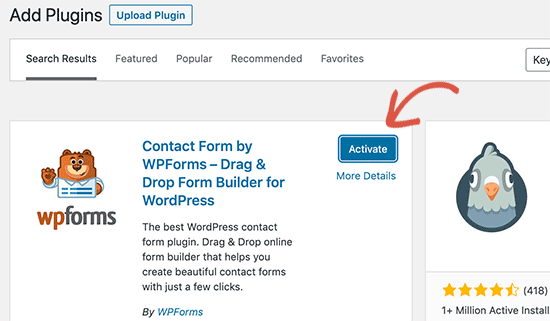
The plugin will be installed on your WordPress website. After Installation, you will notice the ‘Activate’ option.
Note- You can install the plugin on your site, but it will not work unless you activate it.
Now, click on the activate option to use it.
It’s Done. You have successfully installed the WordPress plugin o your site.
Next, you have to configure the plugin settings. These settings vary for each plugin. We are not covering that topic here.
2. Using the WordPress Plugin Upload option
The WordPress plugin directory does not include paid WordPress plugins. So these plugins cannot be installed using the first method. WordPress Provides the upload option to install paid plugins.
To install the paid plugin on your WordPress website, you have to download the plugin from the source. The downloaded plugin will be a zip file.
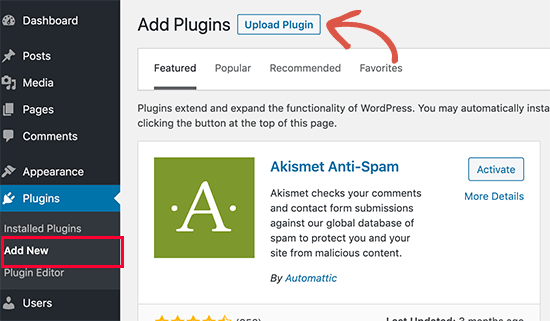
Then, visit the WordPress admin area and go to Plugins » Add New.
Now, click the ‘Upload Plugin’ option on top.
After that, you will see the plugin upload form.
Now, select the ‘Choose File’ tab and select the plugin file you downloaded earlier.
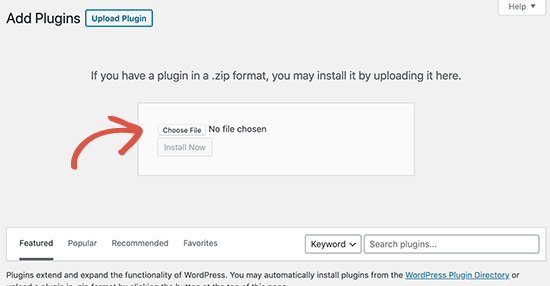
Now click the ‘Install Now’ option.
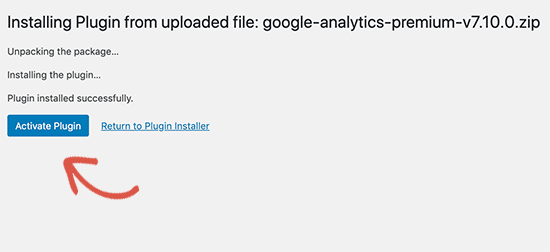
The plugin will be installed on your WordPress site. And You will get a success message after the installation is completed.
Now, click on the Activate Plugin option to use the plugin on your site.
Next, you have to configure the plugin settings. These settings vary for each plugin. We are not covering that topic here.
3. Using FTP
Mostly, you will need to use the above two methods.
However, there may be some rare cases where your hosting provider may have file restrictions that could stop you from installing the plugin from the admin area.
In that case, you can install the plugin using FTP. This method is less friendly for beginners. Let’s move to the method itself.
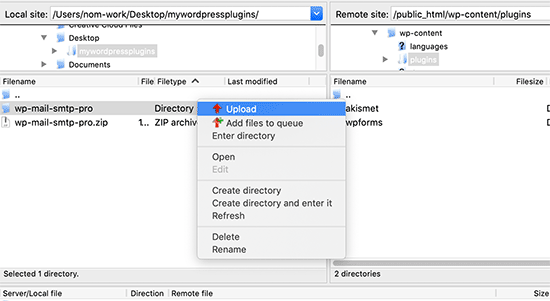
You have to download the plugin’s source file. It will be a zip file, and you have to extract the zip file on your computer.
While extracting the plugin zip file, it will create a new folder with the same name.
You will need to upload this folder to your website using an FTP client.
Now, you have to access your host through the FTP manager.
Note- You will need your FTP username and password. If you don’t have one, contact your WordPress hosting provider and ask them to provide it.
To connect your website to the FTP client, Open the FTP client on your computer and enter the login credentials provided by your WordPress hosting provider.
After that, visit the /wp-content/plugins/ folder on your website.
Then, you have to upload the extracted folder to the /wp-content/plugins/ folder on your web server.
Once you upload the files, It’s done.
Go to your WordPress admin area to see the installed plugins in your WordPress.
Click on the Plugins option to see the plugins on the plugin page.
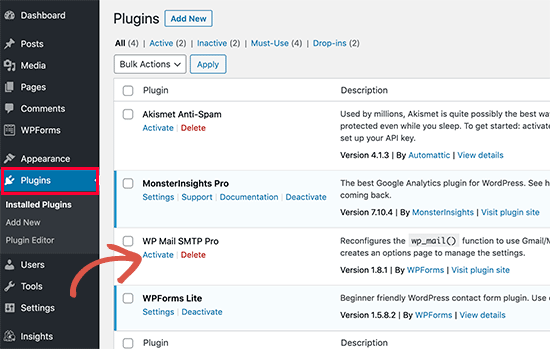
Now, click on the Activate Plugin option to use the plugin on your site.
Next, you have to configure the plugin settings. These settings vary for each plugin. We are not covering that topic here.
We hope this tutorial helped you to install plugins in your WordPress.