
How to create a Question-Answer site in WordPress (step-by-step)
We all know how well-organized, intuitive as well as successful Question-Answer sites like Quora, Reddit, and Yahoo Answers are. Off Corse, when most users rush to the internet to find the solution to their queries, it’s no secret why these websites are so successful and renowned. Are you also planning to build something similar? You have landed right. Whether you want to create a Question-Answer site in WordPress or simply want to add a question-Answer section to your already existing site, this guide is for you.
This ultimate will assist you in quickly creating a visually appealing, fully functional question-and-answer website or a section in no time.
So, without further digressing, Let’s get started!
Why create a question-answer site in WordPress, or why add a FAQ section to your website?
There may be various reasons why you would want to create a question-and-answer site or add a distinct question-and-answer section or page to your website. As previously said, the majority of people seek answers on the internet. Hence, having a fully functional, comprehensive, and well-designed question-and-answer site can be a wonderful approach to establishing a large audience, enhancing ROI, and ultimately creating a name that people will remember for years.
Furthermore, if your clients ask similar questions on a daily basis, having a distinct question-and-answer section on your website can make it easier for you to respond to them. Alternatively, you can simply provide users with your business information in the form of questions and answers.
No matter what’s your reason for creating a question-answer site, having helpful FAQs on a website can enhance user experience on your site and help them interact and engage with your brand for longer.
How to get started with the Question-Answer website?
To create a question-answer site in WordPress, you’d need the basic things required to create a website. These include a domain name, web hosting, a CMS, plugins, and a few other tools.
Domain: Domain name is your website’s name that you and people will use to reach you online.
Hosting: Web hosting will allow you to be accessible on the internet all the time.
CMS: CMS such as WordPress will allow you to create, publish and manage your question-answer website easily.
Plugin: Plugins will add additional functionalities to your site (more on this later).
Note that you’d need all these if you are just starting and willing to create a website from scratch.
See our easy and step-wise tutorial to see how to create a WordPress website easily.
The guide will help you easily create and configure your website settings. Once done, continue with this guide to add question-answer functionality to your site and make it fully functional.
If you already have an established WordPress website, skip this step and continue with the next step.
How to set up your Question-Answer site?
Once you successfully create your website, next you need to add the question-and-answer feature to your site.
In this section, we’ll walk you through the step-by-step method to add the Q&A feature to your site using the plugin AnsPress to create a question-answer site in WordPress easily.

Let’s dive into the detailed process.
1. Install AnsPress.
First of all, you need to install the plugin AnsPress. It’s an efficient and feature-rich plugin that lets you easily add a question-answer feature to your WP website easily. The best part of this plugin is that it automatically creates all the essential pages you need to create a fully-functional question-answer website.
It provides you with a page similar to Quora where people can enter their questions in the search box to get their solutions.
So, move ahead and install and activate the AnsPress plugin on your website.
If you are not sure of the process, see our step-wise tutorial on how to install plugins.
Once activated, the plugin AnsPress automatically adds question-answer pages to your website. You can see these pages by heading over to AnsPress>>Settings from your WP dashboard.
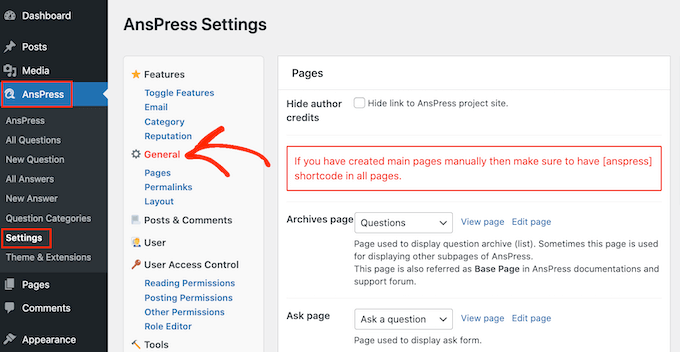
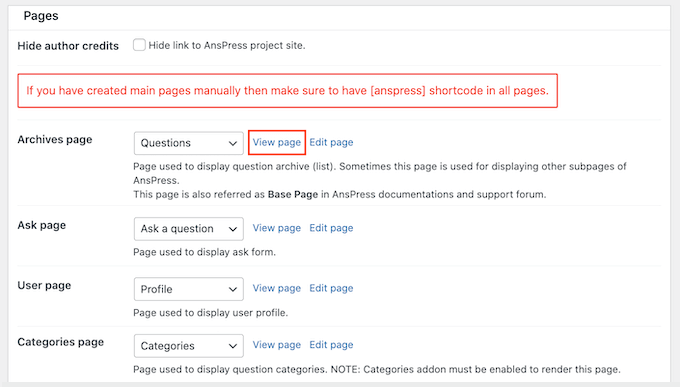
On the next screen, select the ‘General’ option. This will display all the pages that this plugin has created. You can simply navigate to any page by clicking on the ‘View page’ link.
Usually, the default AnsPress pages work well for most WP websites and blogs. But you can always modify or add your content to these pages, per your choice.
2. set up plugin configurations
This section will allow you to make desired changes and set up AnsPress to create a Question-Answer site in WordPress.
i. Add content
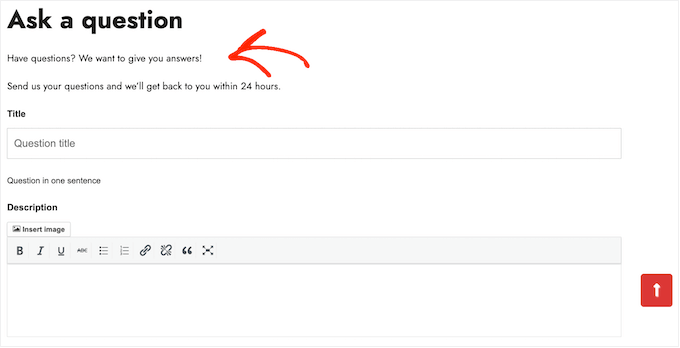
You can easily modify the content of your pages as per your need and choice. For instance, you may want to add enticing and informative content on your site so that you can encourage visitors and customers to ask their questions and tell the time duration when they can expect the answers.
Now, to add your desired content on the question answer pages, click on the ‘Edit page’ link next to the page (anyone that you want to edit.)
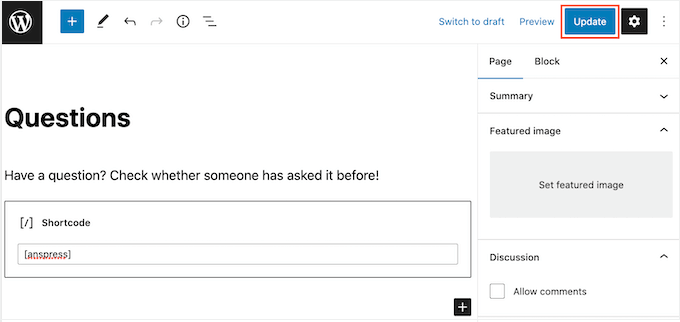
Then, you will be directed to the standard post editor, where you can easily add your text, images, or more.

Note that, AnsPress uses shortcodes to add all its content. Thus, make sure you don’t change or remove this code in any way.
Once you have added your desired content to your Q&A page, click on the ‘Update’ tab.
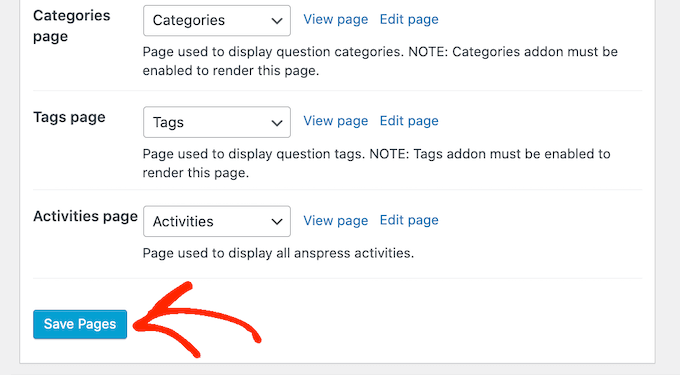
Similarly, you can modify your other default Q&A page easily. Once satisfied with all the pages, click on the ‘Save Pages’ tab to save your changes.
ii. Hide Author credits.
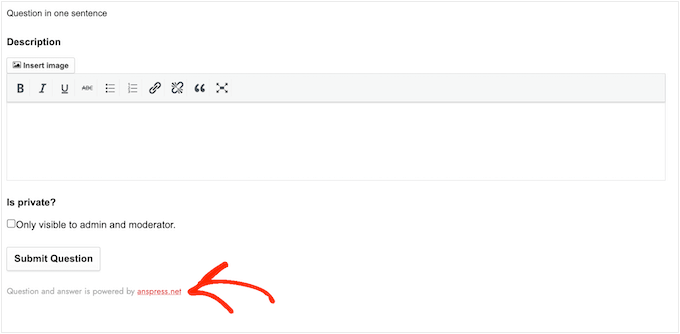
By default, all the pages added by the plugin AnsPress includes the default text ‘Questions and Answer is powered by anspress.net.’
This setting can make your site look unprofessional. In addition, the default text contains a link to the AnsPress site which can hamper your SEO. This is because the link can encourage visitors to leave your site, impacting your pageviews, bounce rates, and your page’s average time.
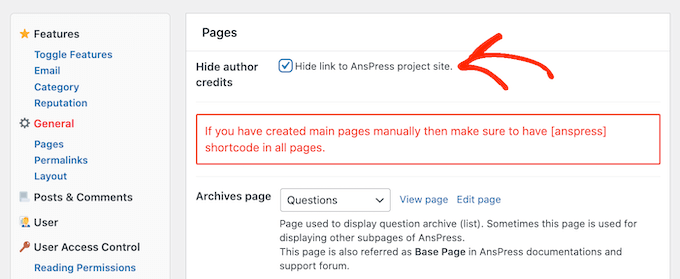
Thus, it’s essential to remove the text. For this, check the box next to the ‘Hide author credits’ option and then click on the ‘save changes’ tab to store your settings.
Once done, you’ll witness that the text from all your Q&A pages has been removed.
iii. Permalink settings
Next, in the AnsPress settings, scroll down to navigate to the permalinks section. There you’ll see the default permalink structure and settings. These settings may work for most websites, but you can improve your website SEO by optimizing the permalink structures.
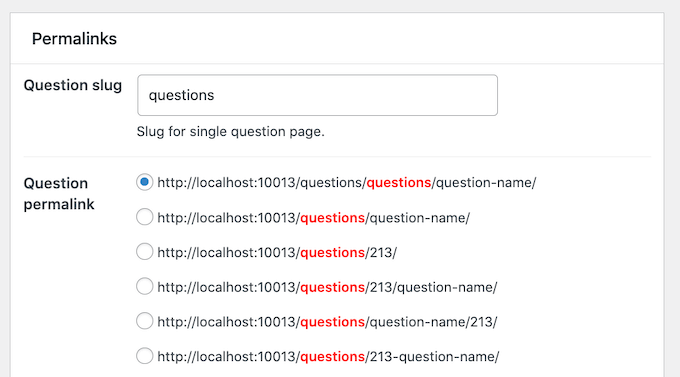
You know how valuable keywords are. So, by adding some relevant keywords to the default ‘Question slug,’ you can create SEO-friendly URLs.
For instance, you can change the slug’s ‘questions’ to ‘WordPress-questions.’ This can help you rank for the word ‘WordPress.’

If you make changes to the slug, click on the ‘Save Changes’ tab to store your settings.
iv. Layout settings.
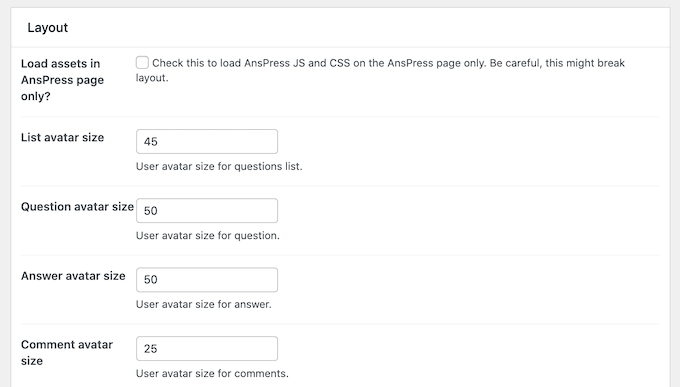
Now, scroll down to the ‘Layout’ sections to modify the Q&A page’s layout.
In the layout settings, you’ll witness that the plugin displays the user’s Gravatar in multiple places, such as next to questions, answers, and comments. You can change the size of the avatars by simply changing the digits in the box next to each.
Moving next, the plugin, by default, displays 20 questions and five answers per page. You can change these as per your choice by simply changing the digits next to ‘Question per page’ and ‘Answer per page.’
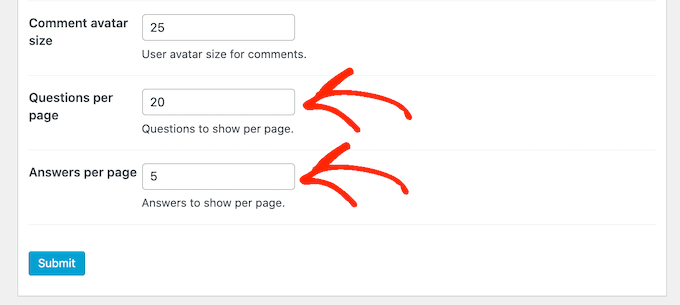
Note that by reducing the number of questions and answers per page, you can speed up your website performance (as there will be less content to load) and help visitors who are navigating your site using smaller devices (as they need to scroll less).
However, also keep in mind that most visitors expect to see the answers on the first page, so choose a reasonable number of questions and answers per page.
Once you are satisfied with your settings, click on the ‘submit’ button to save your changes.
v. Email settings
An essential feature that streamlines all the processes and helps you run a question-answer site effortlessly is email notifications. These are important for both site owners as well users. It notifies site admins when customers and visitors post new questions on their site and notifies users when they get answers to their queries.
The plugin, AnsPress, comes with an in-built email notification feature that helps you run your question-answer site effortlessly. The default settings work out of the box, but you can make sure everything is set correctly by simply clicking on the ‘Email’ link.
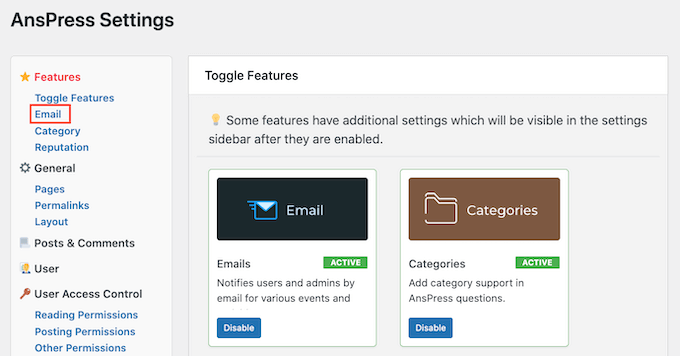
On the next screen, you can cross-check the emails that the plugin will send automatically.
You can enable the emails you want to keep and disable those you don’t want simply by clicking the box next to each.
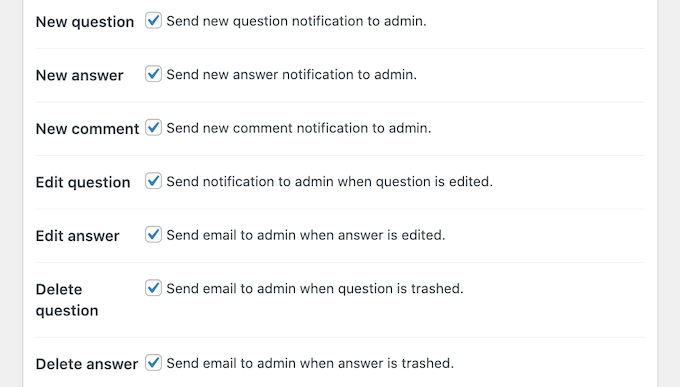
Once done, click on the ‘save changes’ tab to store your settings.
vi. User Access Control settings.
Whether you want to create a question-answer site that is open to the public or a website that is open to only registered users, both have their own merits and demerits. You can simply make your website open to all; you can register users for free to access your question and answers, or you can create a membership site where you can charge users to get access to your question-answer site.
Whichever way you choose, you can review and control the user permissions by navigating to ‘user-access control.’
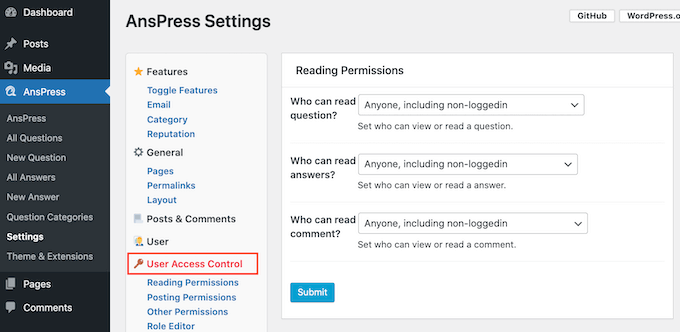
Under this setting, you can manage the content that users (non-logged-in, logged-in users, or premium members) can access and the actions they can perform.
You can adjust the default settings from the dropdown options. In addition, you can also set whether you want the questions and answers to get posted automatically or you want them to approve manually.
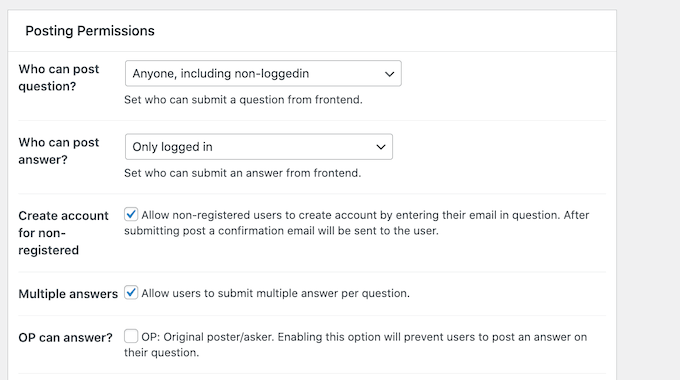
These settings can have a major impact on your website. So, determine what suits you best after going through each carefully, and then make the desired changes. If you make the changes, save your changes by clicking on the ‘Submit’ button.
vii. Reputation settings
AnsPress comes with a feature called ‘Reputation,’ that engages your site users by awarding reputation points for different actions. The feature is set by default, but if you want to make changes to the points for each action, you can navigate to the ‘Reputation’ settings. On the next screen, you can see the reputation points for each action.
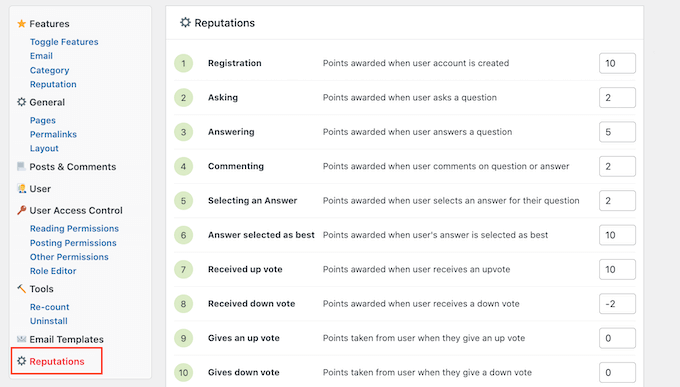
To change the points, you can simply change the digit in each box and then click on the ‘Save Events Points’ option to store your settings.
Once you are satisfied with your plugin settings, you can add your Question-answer pages to your website navigation menu. This will help your site visitors to discover your Question-answer page effortlessly.

3. Manage your Question Answer Site
Till now, you have successfully created a question-answer site in WordPress. Now, your site is fully ready to accept questions and answers from users.
Depending on your settings, you might need to manually accept some or all questions and answers.
By default, the plugin will email you (the admin) for approval if you opt for the ‘manual approval.’ You can also see these notifications in your admin dashboard.
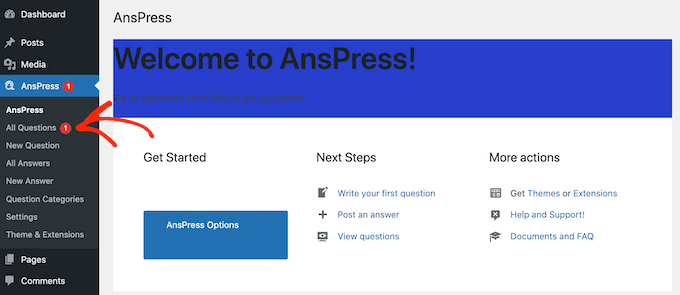
To manually approve the question or answer, you need to click on ‘All questions’ or ‘All Answers.’ Then click on the ‘view’ option to preview the particular post and then publish it. If you do not want to publish it, you can simply select ‘Delete’ or ‘Delete Permanently.’
That’s it. You’ve added the Question-Answer feature to your site successfully.
To Conclude
If you’ve gotten this far, then you’ve effectively built a WordPress question-and-answer site. To help you better grasp the process, we’ve provided a step-by-step method to create a question-answer site in WordPress in this guide. We hope this guide has helped you learn the process of creating a fully functional question-and-answer website.
There are other plugins that allow you to build a FAQ website, but AnsPress is our preferred option. It is more customizable and allows you to easily incorporate the Q&A feature into the WP site.
Go ahead with AnsPress following this the steps mentioned above and enhance your brand’s interaction with your users.